


Hey there, welding enthusiasts! As a supplier of the BX1 - 200A AC Welding Machine, I'm stoked to share some insights on how to test the welding performance of this awesome piece of equipment. Whether you're a seasoned welder or just starting out, understanding how to evaluate the performance of your welding machine is crucial. So, let's dive right in!
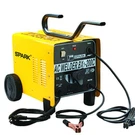
Understanding the BX1 - 200A AC Welding Machine
Before we jump into the testing process, let's take a quick look at what makes the BX1 - 200A AC Welding Machine so special. This machine is designed to provide reliable and efficient welding performance for a variety of applications. It offers a stable arc, which is essential for creating high - quality welds. Plus, it's built tough to withstand the rigors of daily use in a workshop or on a job site.
![]()

Visual Inspection
The first step in testing the welding performance is a good old - fashioned visual inspection. Start by checking the machine's exterior for any signs of damage, such as cracks, dents, or loose parts. Make sure all the cables are in good condition, without any fraying or exposed wires. A damaged cable can not only affect the performance of the machine but also pose a safety hazard.
Next, take a look at the control panel. Ensure that all the switches and knobs are functioning properly. They should move smoothly without any sticking or grinding. If you notice any issues during the visual inspection, it's best to address them before proceeding with further testing.
Power Supply Check
The BX1 - 200A AC Welding Machine requires a stable power supply to operate effectively. Plug the machine into a suitable power outlet and check the voltage. The machine is designed to work within a specific voltage range, so make sure the input voltage is within the recommended limits. You can use a multimeter to measure the voltage accurately.
If the voltage is too low, the machine may not be able to generate enough power to create a strong arc. On the other hand, if the voltage is too high, it can damage the internal components of the machine. So, getting the power supply right is crucial for optimal performance.
Arc Initiation Test
Once you've confirmed that the power supply is stable, it's time to test the arc initiation. Put on your welding gear, including a helmet, gloves, and protective clothing. Select a suitable electrode for the test and insert it into the electrode holder.
Position the electrode close to the workpiece and strike an arc. A good welding machine should initiate the arc easily and smoothly. If you have trouble starting the arc, it could indicate a problem with the machine's output voltage or the electrode. Try adjusting the current settings on the control panel and see if that helps.
Arc Stability Test
After successfully initiating the arc, it's important to test its stability. A stable arc is essential for creating a consistent and high - quality weld. As you weld, pay attention to how the arc behaves. It should remain steady without flickering or going out.
If the arc is unstable, it can result in a poor - quality weld with uneven bead formation. There are several factors that can affect arc stability, such as the current setting, electrode type, and workpiece surface condition. Try adjusting the current to see if you can improve the arc stability. If the problem persists, it might be a sign of an issue with the machine itself.
Weld Quality Assessment
The ultimate goal of welding is to create a strong and durable weld. To assess the quality of the weld, you can perform a visual inspection of the weld bead. A good weld bead should be smooth, uniform, and free of defects such as cracks, porosity, or excessive spatter.
You can also use a penetrant test or a magnetic particle test to detect any internal defects in the weld. These tests involve applying a special dye or magnetic particles to the weld surface and then examining it for signs of flaws. If you find any defects in the weld, it's important to analyze the cause and take corrective actions, which may include adjusting the welding parameters or replacing the electrode.
Heat Output and Regulation Test
The BX1 - 200A AC Welding Machine should be able to maintain a consistent heat output during the welding process. You can test the heat output by welding a small piece of metal for a few minutes and then feeling the temperature of the workpiece. The heat should be evenly distributed across the weld area.
To test the heat regulation, you can adjust the current settings on the control panel and observe how the heat output changes. The machine should respond quickly to the adjustments and maintain the desired heat level. If the heat output is erratic or difficult to control, it could indicate a problem with the machine's regulation system.
Comparing with Similar Models
It's also a good idea to compare the performance of the BX1 - 200A AC Welding Machine with similar models on the market. For example, you can check out the BX1 - 200C AC Welding Machine, Plastic AC Transformer Welding Machine, and BX1 - 200B AC Welding Machine. By comparing the features and performance of different models, you can get a better understanding of how the BX1 - 200A stacks up.
Final Thoughts and Invitation to Connect
Well, that's a wrap on how to test the welding performance of the BX1 - 200A AC Welding Machine. I hope you found this blog post helpful. If you're in the market for a reliable and high - performance welding machine, the BX1 - 200A is definitely worth considering.
If you have any questions about the BX1 - 200A AC Welding Machine or want to discuss your welding needs further, don't hesitate to reach out. We're always here to help you find the right welding solution for your projects. Whether you're a small - scale workshop or a large - scale industrial operation, we've got you covered.
References
- Welding Handbook, American Welding Society.
- Guide to Welding Machine Testing, Industry Publications.