

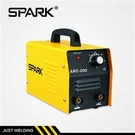



Hey there, fellow welders! I'm a supplier of Digital MMA Welding Machines, and I know how crucial it is to get that arc length just right. In this blog, I'll walk you through how to adjust the arc length on a Digital MMA Welding Machine.
Understanding Arc Length
First off, let's talk about what arc length is. The arc length is the distance between the tip of the welding electrode and the workpiece. It's a super important factor in welding because it affects the quality of the weld. If the arc length is too long, the weld can be weak, have lots of spatter, and look uneven. On the other hand, if it's too short, the electrode can stick to the workpiece, and you might not get a good penetration.
Why Adjusting Arc Length Matters
Getting the right arc length is key for a few reasons. It helps control the heat input into the metal. When the arc length is correct, you can achieve better fusion between the electrode and the workpiece. This means a stronger and more reliable weld. Also, proper arc length reduces the amount of spatter, which makes the welding process cleaner and less messy. It's like the difference between a smooth, professional paint job and a sloppy one.


Tools and Equipment You'll Need
Before we dive into adjusting the arc length, let's make sure you have everything you need. Of course, you'll need a Digital MMA Welding Machine. We offer a range of great machines, like the Advanced Inverter MMA with Plastic Foot, the Digital MMA with Two Knobs, and the Hobby MINI MMA with Two Knobs.
You'll also need welding electrodes that are suitable for the type of metal you're welding. Safety gear is a must - welding helmet, gloves, and protective clothing. And don't forget a clean and stable workpiece.
Step - by - Step Guide to Adjusting Arc Length
Step 1: Set Up Your Welding Machine
Start by setting up your Digital MMA Welding Machine. Make sure it's properly grounded. Plug it in and turn it on. Check the display to see if it's functioning correctly. Select the appropriate welding current based on the thickness of the metal you're working with. Generally, thicker metals require higher currents.
Step 2: Prepare the Electrode
Choose the right electrode for your project. Remove it from its packaging and make sure the tip is clean. Insert the electrode into the electrode holder. Make sure it's firmly in place.
Step 3: Strike the Arc
Now, it's time to strike the arc. Hold the electrode at a slight angle to the workpiece. Tap the electrode gently on the workpiece to start the arc. It might take a few tries, especially if you're new to welding. Once the arc is struck, you'll see a bright light and a pool of molten metal forming.
Step 4: Observe the Arc
Pay close attention to the arc. If the arc is too long, you'll notice a lot of spatter flying around, and the weld bead will look wide and uneven. If the arc is too short, the electrode will tend to stick to the workpiece, and the weld might not penetrate properly.
Step 5: Adjust the Arc Length
To adjust the arc length, you basically need to move the electrode closer or further away from the workpiece. If the arc is too long, move the electrode closer to the workpiece. If it's too short, move it slightly further away. You'll need to do this while keeping the electrode moving in a steady motion along the weld joint.
It takes a bit of practice to get the feel for it. You might want to start by making some test welds on a scrap piece of metal. Watch how the arc behaves and how the weld bead forms as you adjust the arc length.
Tips for Adjusting Arc Length
- Keep a Steady Hand: A steady hand is crucial for maintaining a consistent arc length. Practice your hand - movement before you start on an important project.
- Use the Right Technique: There are different welding techniques, like the drag technique and the push technique. Each technique might require a slightly different arc length. Learn which technique is best for your project and adjust the arc length accordingly.
- Pay Attention to the Weld Pool: The size and shape of the weld pool can tell you a lot about the arc length. A healthy weld pool should be smooth and well - defined. If the pool is too large or too small, it might be a sign that the arc length needs adjustment.
Troubleshooting Arc Length Issues
Sometimes, you might run into problems while trying to adjust the arc length. Here are some common issues and how to fix them:
Electrode Sticking
If the electrode keeps sticking to the workpiece, it usually means the arc length is too short. Try increasing the arc length slightly. You can also try using a higher welding current, but be careful not to go too high or you'll create other problems.
Excessive Spatter
A lot of spatter indicates that the arc length is too long. Move the electrode closer to the workpiece to reduce the spatter. Also, make sure the electrode is the right type for the metal you're welding.
Poor Penetration
If the weld isn't penetrating the metal properly, the arc length might be too long or the welding current might be too low. Try decreasing the arc length and increasing the current a bit.
Conclusion
Adjusting the arc length on a Digital MMA Welding Machine is an important skill that every welder should master. It takes a bit of practice, but once you get the hang of it, you'll be able to produce high - quality welds.
If you're in the market for a new Digital MMA Welding Machine, we've got a great selection to choose from. Whether you're a professional welder or just starting out as a hobbyist, our machines are designed to meet your needs.
If you have any questions or want to talk about your specific welding requirements, feel free to reach out. We're here to help you make the right choice and get the most out of your welding experience. Let's start a conversation and see how we can work together!
References
- Welding Handbook, American Welding Society
- Practical Welding Engineering, ASM International