

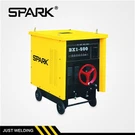
Hey there, fellow welding enthusiasts! As a supplier of the BX1 - 200C AC Welding Machine, I've gotten a ton of questions about how to replace its parts. So, I thought I'd put together this blog to walk you through the process step - by - step.
First off, let's talk about why you might need to replace parts in the BX1 - 200C. Welding machines, like any other piece of equipment, go through wear and tear over time. Maybe you've been using your machine non - stop for a big project, or perhaps there was just a bit of bad luck and a part malfunctioned. Whatever the reason, replacing parts can extend the life of your machine and keep it running smoothly.
Tools You'll Need
Before you start replacing any parts, you need to gather the right tools. You'll typically need a set of screwdrivers (both flat - head and Phillips), a pair of pliers, and possibly a wrench or two depending on the part you're replacing. Having these tools handy will make the process a whole lot easier.
Safety First
Safety is super important when working on any welding machine. Make sure the machine is unplugged from the power source before you start taking it apart. Welding machines deal with high - voltage electricity, and you don't want to get zapped! Also, wear safety goggles and gloves to protect yourself from any sharp edges or debris.
Identifying the Problematic Part
The first step in replacing a part is to figure out which one is causing the problem. Sometimes, it's obvious. For example, if the welding cable is frayed or damaged, you can clearly see that it needs to be replaced. Other times, it might be a bit more tricky. If the machine isn't producing a proper arc, it could be an issue with the transformer, the electrode holder, or even the control panel.
If you're not sure which part is the problem, you can do a few basic checks. Look for any visible signs of damage, like burnt components or loose connections. You can also try testing the machine with a different electrode or cable to see if that solves the problem.
Replacing the Welding Cable
One of the most common parts to replace in a welding machine is the welding cable. Over time, the cable can get damaged from being dragged around, bent too much, or exposed to heat.
To replace the welding cable, start by removing the old cable from the machine. Use your screwdriver to loosen the screws that hold the cable in place. Once the screws are loose, gently pull the cable out.
Next, take your new cable and insert it into the same place where the old one was. Make sure it's properly seated and then tighten the screws to secure it. It's a good idea to double - check that the connection is tight to avoid any electrical issues.
Replacing the Electrode Holder
The electrode holder is another part that can wear out. If it's not gripping the electrode properly, it can affect the quality of your weld.
To replace the electrode holder, first, disconnect the old holder from the welding cable. You'll usually find a nut or a clamp that holds it in place. Use your wrench or pliers to loosen it and remove the old holder.
Then, attach the new electrode holder to the cable. Make sure it's tightened securely so that it won't come loose during use.
Replacing the Transformer
Replacing the transformer is a bit more complicated and should only be done if you have some experience with electrical work. The transformer is a crucial part of the welding machine, as it converts the electrical voltage to the right level for welding.
If you've determined that the transformer needs to be replaced, start by removing the cover of the welding machine. This will give you access to the internal components. Locate the transformer and carefully disconnect all the wires that are connected to it. Make sure to label the wires so that you can reconnect them correctly later.
![]()

Once the wires are disconnected, use your screwdriver to remove the bolts or screws that hold the transformer in place. Lift out the old transformer and place the new one in its spot. Reconnect the wires according to your labels and then replace the cover of the machine.
Other Parts and Resources
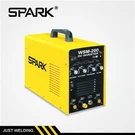
If you're interested in other welding machines similar to the BX1 - 200C, we also offer the BX1 - 200A AC Welding Machine and the BX1 - 200B AC Welding Machine. These machines have similar features and might be a good fit for your needs.
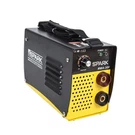
We also have a Popular Small Transformer Hobby Welding Machine that's great for hobbyists or small - scale projects.
Conclusion
Replacing parts in a BX1 - 200C AC Welding Machine isn't always easy, but with the right tools, a bit of knowledge, and some patience, you can do it. Remember to always prioritize safety and take your time. If you're ever unsure about a step, it's a good idea to consult the machine's manual or reach out to a professional.
If you're in the market for replacement parts or a new welding machine, we're here to help. We offer high - quality parts and machines at competitive prices. Whether you're a professional welder or just starting out, we've got what you need. Feel free to reach out to us to discuss your requirements and start a procurement negotiation.
References
- Welding Machine Manual: BX1 - 200C AC Welding Machine
- General Welding Equipment Knowledge: Industry - standard guides on welding machine maintenance and repair.