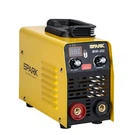


As a supplier of the BX1 - 200B AC Welding Machine, I often receive inquiries from customers about how to adjust the welding current on this machine. Proper current adjustment is crucial for achieving high - quality welds, ensuring safety, and maximizing the lifespan of the welding equipment. In this blog, I'll guide you through the process of adjusting the welding current on the BX1 - 200B AC Welding Machine.
Understanding the BX1 - 200B AC Welding Machine
The BX1 - 200B AC Welding Machine is a popular choice among welders due to its reliability, affordability, and suitability for a wide range of welding tasks. It operates on alternating current (AC), which is ideal for general - purpose welding applications such as repair work, fabrication, and light - duty industrial use.
This machine is designed with a simple yet effective current adjustment mechanism. The ability to control the welding current allows you to adapt to different welding materials, thicknesses, and joint configurations. For instance, thicker materials usually require higher welding currents to ensure proper penetration, while thinner materials need lower currents to prevent burn - through.
Factors Affecting Welding Current Selection
Before we delve into the actual process of adjusting the current, it's important to understand the factors that influence the appropriate current setting.
Material Thickness
One of the most significant factors is the thickness of the material being welded. As a general rule, for every 1mm increase in material thickness, you may need to increase the welding current by a certain amount. For example, when welding a 3mm thick mild steel plate, you might start with a lower current compared to welding a 6mm thick plate.
Welding Position
The position in which you are welding also plays a role. Welding in the flat position is generally easier and allows for a wider range of current settings. However, when welding in vertical or overhead positions, you may need to reduce the current to prevent the molten metal from dripping.
Electrode Type and Size
Different electrode types and sizes are designed to work within specific current ranges. For example, a 2.5mm diameter electrode will have a different optimal current range compared to a 3.2mm diameter electrode. Always refer to the electrode manufacturer's recommendations for the appropriate current settings.
Steps to Adjust the Welding Current on the BX1 - 200B AC Welding Machine
Step 1: Safety First
Before you start adjusting the current or operating the welding machine, ensure that you have taken all necessary safety precautions. Wear appropriate personal protective equipment (PPE), including a welding helmet, gloves, and protective clothing. Make sure the welding area is well - ventilated to prevent the inhalation of harmful fumes.
Step 2: Power Off
Switch off the power supply to the welding machine. This is a crucial safety step to avoid any electrical hazards during the adjustment process.
Step 3: Locate the Current Adjustment Knob
On the BX1 - 200B AC Welding Machine, the current adjustment knob is usually clearly marked. It is typically located on the front panel of the machine. The knob is used to increase or decrease the welding current.
Step 4: Determine the Initial Current Setting
Based on the factors mentioned above (material thickness, welding position, and electrode type/size), determine an initial current setting. You can refer to welding charts or the electrode manufacturer's guidelines for a starting point. For example, if you are welding a 4mm thick mild steel plate with a 3.2mm diameter electrode in the flat position, you might start with a current setting of around 100 - 120 amps.
Step 5: Adjust the Current
Slowly turn the current adjustment knob in either the clockwise or counter - clockwise direction to increase or decrease the current, respectively. As you turn the knob, you will notice a corresponding change in the ammeter reading on the machine. Make small adjustments and monitor the ammeter closely to reach your desired current setting.
Step 6: Test Weld
Once you have set the current, perform a test weld on a scrap piece of the same material. Observe the quality of the weld. If the weld bead is too wide and the penetration is excessive, the current may be too high. If the weld bead is too narrow and there is insufficient penetration, the current may be too low. Based on the results of the test weld, make further adjustments to the current setting.


Common Mistakes to Avoid
Over - adjusting the Current
Some welders tend to set the current too high in an attempt to speed up the welding process. This can lead to burn - through, excessive spatter, and poor weld quality. Always start with a conservative current setting and make incremental adjustments as needed.
Ignoring Electrode Recommendations
Each electrode is designed to work within a specific current range. Ignoring these recommendations can result in poor arc stability, increased electrode consumption, and sub - standard welds.
Not Considering Welding Position
As mentioned earlier, welding position affects the appropriate current setting. Failing to adjust the current based on the welding position can lead to problems such as molten metal dripping in vertical or overhead welding.
Other Related Welding Machines
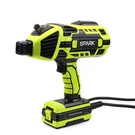
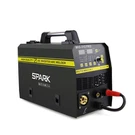
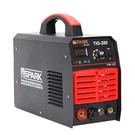
If the BX1 - 200B AC Welding Machine doesn't quite meet your specific requirements, we also offer other similar products. For example, the BX1 - 200A AC Welding Machine has its own unique features and advantages. It may be more suitable for certain types of welding jobs or user preferences. Another option is the BX1 - 200C AC Welding Machine, which offers different performance characteristics. And for those who are into hobby - level welding, the Popular Small Transformer Hobby Welding Machine is a great choice.
Conclusion
Adjusting the welding current on the BX1 - 200B AC Welding Machine is a skill that can be mastered with practice. By understanding the factors that affect current selection, following the proper adjustment steps, and avoiding common mistakes, you can achieve high - quality welds consistently. Whether you are a professional welder or a hobbyist, having the ability to control the welding current is essential for successful welding projects.
If you are interested in purchasing the BX1 - 200B AC Welding Machine or any of our other welding products, please feel free to contact us for more information and to discuss your specific needs. We are committed to providing you with the best welding solutions and support.
References
- "Welding Handbook", American Welding Society
- Manufacturer's Manual for BX1 - 200B AC Welding Machine