


Bead welding is a fundamental process in metalworking, widely used for various applications such as repair work, fabrication, and artistic metal creations. As a reliable MIG welding machine supplier, I understand the importance of providing clear guidance on how to use a MIG welding machine for bead welding effectively. In this blog, I'll walk you through the step-by-step process, from preparation to the actual welding technique, ensuring you achieve excellent results every time.
Preparing for Bead Welding
Before you start bead welding, proper preparation is crucial to ensure a successful and safe welding process. Here are the key steps to take:
Safety First
- Wear Protective Gear: Always wear a welding helmet with a proper shade lens to protect your eyes and face from harmful UV radiation and sparks. Additionally, use flame-resistant gloves, a welding jacket, and safety boots to safeguard your body.
- Ventilation: Work in a well-ventilated area to remove welding fumes and gases. If possible, use a local exhaust ventilation system to ensure a clean and safe working environment.
Select the Right Welding Machine
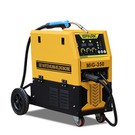
As a MIG welding machine supplier, we offer a range of high-quality machines to suit different needs. For bead welding, consider the following options:


- Powerful MIG Welding Machine: Ideal for heavy-duty welding tasks, this machine provides sufficient power and stability for consistent bead welding.
- Multifunction MIG Welding Machine: Offers versatility, allowing you to switch between different welding modes and adjust settings according to the specific requirements of your bead welding project.
- Gasless MIG For Flux Wire: A convenient option for outdoor or on-site welding, eliminating the need for a gas cylinder while still providing good weld quality.
Choose the Right Welding Wire and Gas
- Welding Wire: The type of welding wire you choose depends on the material you are welding. For mild steel, ER70S-6 is a commonly used wire. Make sure the wire diameter is appropriate for your welding machine and the thickness of the workpiece.
- Shielding Gas: If you are using a gas-shielded MIG welding machine, select the right shielding gas. For most mild steel bead welding applications, a mixture of argon and carbon dioxide (typically 75% argon and 25% carbon dioxide) is recommended.
Prepare the Workpiece
- Clean the Surface: Use a wire brush or grinder to remove any rust, paint, oil, or debris from the surface of the workpiece. A clean surface ensures better weld adhesion and quality.
- Joint Preparation: Depending on the type of bead welding joint you need to make, prepare the edges of the workpiece accordingly. For example, for a butt joint, bevel the edges if necessary to ensure proper penetration.
Setting Up the MIG Welding Machine
Once you have completed the preparation steps, it's time to set up your MIG welding machine. Here's how:
Connect the Power and Gas
- Power Supply: Connect the welding machine to a suitable power source, following the manufacturer's instructions. Make sure the power supply voltage matches the requirements of the machine.
- Gas Supply: If you are using a gas-shielded MIG welding machine, connect the gas cylinder to the machine using the appropriate regulator and hoses. Open the gas valve and set the gas flow rate according to the welding wire and workpiece thickness.
Install the Welding Wire
- Open the Wire Feed Mechanism: Refer to the user manual of your welding machine to open the wire feed mechanism. Install the welding wire spool onto the spool holder and thread the wire through the wire feed system, following the routing guide provided by the manufacturer.
- Adjust the Wire Feed Speed: Set the wire feed speed on the welding machine according to the thickness of the workpiece and the welding amperage. Start with a conservative speed and make adjustments as needed during the welding process.
Set the Welding Amperage
- Determine the Recommended Amperage: The welding amperage depends on the thickness of the workpiece, the welding wire diameter, and the type of joint. Refer to the welding machine manufacturer's chart or guidelines to determine the appropriate amperage setting for your specific application.
- Adjust the Amperage: Use the amperage control knob on the welding machine to set the desired amperage. Make small adjustments and test the welding bead on a scrap piece of metal to ensure the settings are correct.
Bead Welding Technique
Now that you have prepared the workpiece and set up the MIG welding machine, it's time to start bead welding. Here's a step-by-step guide to the bead welding technique:
Position the Welding Gun
- Hold the Welding Gun: Hold the welding gun at a comfortable angle and position it over the workpiece where you want to start the bead. Maintain a consistent distance between the welding nozzle and the workpiece, typically around 1/4 to 3/8 inch.
- Angle the Welding Gun: Angle the welding gun slightly in the direction of travel, typically around 10 to 15 degrees. This helps to improve the weld penetration and bead appearance.
Start the Welding Arc
- Press the Trigger: Press the trigger on the welding gun to start the welding arc. The shielding gas will start flowing, and the welding wire will begin to melt and transfer to the workpiece.
- Establish the Weld Pool: Once the welding arc is established, maintain a steady hand and move the welding gun slowly along the joint. This creates a molten weld pool on the workpiece.
Control the Weld Bead
- Maintain a Consistent Speed: Move the welding gun at a consistent speed to ensure a uniform bead width and height. If you move too slowly, the weld bead may become too wide and irregular; if you move too fast, the weld may not penetrate the workpiece properly.
- Manipulate the Welding Gun: To control the shape and size of the weld bead, you can manipulate the welding gun slightly. For example, you can use a weaving motion to create a wider bead or a straight motion for a narrower bead.
Fill the Joint
- Add Welding Wire: As you move the welding gun along the joint, the welding wire will continue to feed into the weld pool. Make sure to add enough welding wire to fill the joint completely and create a strong, seamless weld.
- Overlap the Beads: If you need to make multiple passes to fill a wider joint, overlap the beads slightly to ensure proper fusion between the layers.
Finish the Weld
- Release the Trigger: Once you have completed the bead welding, release the trigger on the welding gun to stop the welding arc. The shielding gas will continue to flow for a few seconds to protect the weld from oxidation.
- Inspect the Weld: After the weld has cooled, inspect it carefully for any defects such as cracks, porosity, or incomplete fusion. If necessary, use a grinder or wire brush to clean up the weld and improve its appearance.
Tips and Tricks for Bead Welding
- Practice Makes Perfect: Bead welding takes practice to master. Start by practicing on scrap pieces of metal to get a feel for the welding process and improve your technique.
- Maintain a Clean Welding Area: Keep the welding area clean and free of clutter to prevent accidents and ensure a smooth welding process.
- Use the Right Welding Technique: Depending on the type of joint and the material you are welding, choose the appropriate welding technique. For example, for lap joints, you may need to use a different technique than for butt joints.
- Adjust the Settings as Needed: During the welding process, you may need to adjust the welding amperage, wire feed speed, or gas flow rate to achieve the best results. Pay attention to the appearance of the weld bead and make adjustments accordingly.
- Seek Professional Help: If you are new to bead welding or encounter any problems during the process, don't hesitate to seek professional help. You can consult with a welding instructor, a fellow welder, or contact our support team as a MIG welding machine supplier.
Contact Us for Procurement and Consultation
If you are interested in purchasing a high-quality MIG welding machine for bead welding or have any questions about the welding process, please feel free to contact us. As a trusted MIG welding machine supplier, we are committed to providing you with the best products and services to meet your needs. Whether you are a professional welder or a DIY enthusiast, we have the right solution for you.
References
- AWS Welding Handbook, Volume 1: Welding Technology. American Welding Society.
- Miller Electric Mfg. Co. MIG Welding: Principles and Procedures.
- Lincoln Electric. MIG Welding Guide.