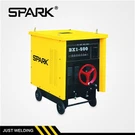
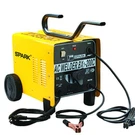

As a supplier of the BX1 - 200B AC Welding Machine, I understand the importance of proper installation, especially when it comes to the grounding wire. Grounding is a crucial safety measure that protects users from electrical shock and reduces the risk of equipment damage. In this blog post, I'll guide you through the step - by - step process of installing the grounding wire of the BX1 - 200B AC Welding Machine.
Why is Grounding Important?
Before we dive into the installation process, let's briefly discuss why grounding is essential for the BX1 - 200B AC Welding Machine. When an electrical fault occurs, such as a short - circuit, the grounding wire provides a low - resistance path for the electrical current to flow safely into the ground. This prevents the machine's frame from becoming energized, which could otherwise lead to serious injury or even death if a person touches it. Additionally, proper grounding helps to stabilize the electrical system, reducing electrical noise and interference, which can improve the performance of the welding machine.
Tools and Materials Needed
To install the grounding wire of the BX1 - 200B AC Welding Machine, you'll need the following tools and materials:
- Grounding wire: Select a grounding wire with sufficient gauge to handle the electrical current. For the BX1 - 200B, a wire with a gauge of at least #6 AWG (American Wire Gauge) is recommended.
- Grounding rod: A copper - clad steel grounding rod, typically 8 feet in length, is commonly used. The grounding rod should be driven into the ground to establish a good electrical connection with the earth.
- Connectors: Use appropriate connectors, such as grounding clamps or lugs, to attach the grounding wire to the welding machine and the grounding rod.
- Wrenches and pliers: These tools will be used to tighten the connectors and drive the grounding rod into the ground.
Step - by - Step Installation Process
Step 1: Select a Suitable Location for the Grounding Rod
Choose a location near the welding machine where the soil is moist and conductive. Avoid areas with rocks, concrete, or other non - conductive materials. The location should also be easily accessible for installation and future maintenance.
Step 2: Drive the Grounding Rod into the Ground
Using a sledgehammer or a grounding rod driver, drive the grounding rod vertically into the ground until at least 8 feet of the rod is buried. Make sure the rod is straight and firmly in place. If the soil is hard, you may need to wet the area around the rod to make it easier to drive.

![]()
Step 3: Prepare the Grounding Wire
Cut the grounding wire to the appropriate length, leaving enough slack to reach from the welding machine to the grounding rod. Strip about 1 - 2 inches of insulation from each end of the wire.
Step 4: Attach the Grounding Wire to the Welding Machine
Locate the grounding terminal on the BX1 - 200B AC Welding Machine. This terminal is usually marked with a "Ground" or "GND" symbol. Use a grounding clamp or lug to attach one end of the grounding wire to the terminal. Tighten the connector securely using a wrench to ensure a good electrical connection.
Step 5: Attach the Grounding Wire to the Grounding Rod
At the other end of the grounding wire, attach a grounding clamp or lug to the exposed copper part of the wire. Then, clamp the connector onto the grounding rod. Make sure the connection is tight and free of any corrosion or debris.
Step 6: Test the Grounding System
After completing the installation, it's important to test the grounding system to ensure it is working properly. You can use a grounding resistance tester to measure the resistance between the welding machine and the ground. The resistance should be less than 25 ohms. If the resistance is higher than this value, you may need to drive additional grounding rods or improve the soil conductivity around the existing rod.
Additional Tips and Precautions
- Inspect the grounding wire regularly: Check the grounding wire for any signs of damage, such as cuts, abrasions, or corrosion. Replace the wire if it is damaged to maintain a good grounding connection.
- Follow local electrical codes: Make sure the installation of the grounding wire complies with all local electrical codes and regulations. These codes are in place to ensure the safety of the electrical system and the users.
- Use proper personal protective equipment (PPE): When working with electrical equipment, always wear appropriate PPE, such as insulated gloves and safety glasses, to protect yourself from electrical shock and other hazards.
Related Products
If you're interested in other welding machines, we also offer a variety of high - quality products, such as the Popular Small Transformer Hobby Welding Machine and the Portable AC ARC Welding Machine. For a similar model to the BX1 - 200B, you may also consider the BX1 - 200A AC Welding Machine.
Contact for Purchase and Consultation
If you have any questions about the BX1 - 200B AC Welding Machine or need further assistance with the grounding wire installation, feel free to contact us. We're here to provide you with professional advice and support. Whether you're a small - scale welder or a large - scale industrial user, we can offer you the best welding solutions to meet your needs.
References
- National Electrical Code (NEC)
- Manufacturer's manual for the BX1 - 200B AC Welding Machine