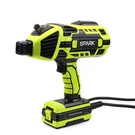


As a trusted supplier of Digital MMA with Two Knobs, I understand the importance of proper alignment for optimal performance. In this blog, I'll share some detailed steps and insights on how to align the knobs of Digital MMA with Two Knobs effectively.
Understanding the Basics of Digital MMA with Two Knobs
Before delving into the alignment process, it's crucial to have a clear understanding of what Digital MMA with Two Knobs is. This type of welding machine offers enhanced control and precision compared to traditional models. The two knobs typically control different parameters, such as current and voltage, allowing welders to fine - tune the welding process according to the specific requirements of the job.
Why Alignment Matters
Proper alignment of the knobs is essential for several reasons. Firstly, it ensures accurate control of the welding parameters. If the knobs are not aligned correctly, the actual output may deviate from the set values, leading to inconsistent weld quality. Secondly, it improves the overall efficiency of the welding process. With well - aligned knobs, welders can make quick and precise adjustments, reducing downtime and increasing productivity.
Step - by - Step Guide to Aligning the Knobs
Step 1: Prepare the Welding Machine
Before starting the alignment process, make sure the welding machine is turned off and unplugged from the power source. This is a safety precaution to prevent any electrical hazards during the alignment. Inspect the machine for any visible damage or loose parts. If you notice any issues, it's advisable to have them repaired before proceeding with the alignment.
Step 2: Familiarize Yourself with the Knobs
Each knob on the Digital MMA with Two Knobs controls a specific parameter. Usually, one knob is for adjusting the welding current, and the other is for adjusting the voltage. Refer to the user manual of the welding machine to confirm which knob controls which parameter. This will help you make the right adjustments during the alignment process.
Step 3: Zero - Setting
Most Digital MMA with Two Knobs machines have a zero - setting function. Set both knobs to their minimum or zero positions. This provides a baseline for the alignment process. Some machines may have a calibration button or function that can be used to set the zero point accurately. Follow the instructions in the user manual to perform the zero - setting correctly.
Step 4: Use a Reference Standard
To ensure accurate alignment, it's recommended to use a reference standard. This can be a calibrated ammeter or voltmeter. Connect the reference standard to the output of the welding machine according to the manufacturer's instructions. Make sure the connections are secure to avoid any measurement errors.


Step 5: Adjust the Current Knob
Turn on the welding machine and set the current knob to a specific value, for example, 50 amps. Check the reading on the reference ammeter. If the reading on the reference ammeter does not match the set value on the knob, adjust the calibration screw or potentiometer associated with the current knob. Make small adjustments and re - check the reading until the reference ammeter shows the correct value.
Step 6: Adjust the Voltage Knob
Similarly, set the voltage knob to a specific value, say 20 volts. Check the reading on the reference voltmeter. If there is a discrepancy between the set value and the reading on the voltmeter, adjust the calibration screw or potentiometer for the voltage knob. Again, make small adjustments and verify the reading until it matches the set value.
Step 7: Repeat the Process
After making the initial adjustments, repeat the process for different values of current and voltage. This helps to ensure that the alignment is accurate across the entire range of the knobs. It's also a good idea to check the alignment periodically during normal use, as factors such as vibration and temperature changes can affect the calibration over time.
Common Issues and Troubleshooting
- Inconsistent Readings: If the reference standard shows inconsistent readings during the alignment process, check the connections between the welding machine and the reference standard. Loose connections can cause fluctuations in the readings. Also, make sure the reference standard is functioning properly.
- Difficulty in Adjusting the Calibration Screw: Some calibration screws may be difficult to access or adjust. In such cases, use the appropriate tools and be careful not to damage the screw or the surrounding components. If you're unsure, consult the user manual or contact the manufacturer's technical support.
- Drift in Calibration: Over time, the calibration of the knobs may drift. This can be due to factors such as component aging or environmental conditions. If you notice a significant drift in the calibration, repeat the alignment process.
Related Products
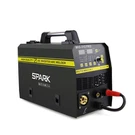
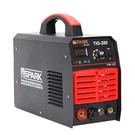
If you're interested in other types of MMA welding machines, we also offer a range of high - quality products. Check out our Mosfet Inverter MMA Welding Machine, which provides advanced features and reliable performance. Our Hand - Held MMA is a convenient option for on - the - go welding tasks. And for those looking for a more economical solution, our Economic MMA without Ammeter is a great choice.
Conclusion
Proper alignment of the knobs of Digital MMA with Two Knobs is crucial for achieving high - quality welds and efficient welding operations. By following the steps outlined in this blog, you can ensure that your welding machine is calibrated accurately. If you have any questions or need further assistance with the alignment process or our products, don't hesitate to contact us. We're here to help you make the most of your welding experience. Whether you're a professional welder or a DIY enthusiast, our Digital MMA with Two Knobs and other related products are designed to meet your needs. Contact us today to discuss your requirements and explore the possibilities of our welding machines.
References
- Manufacturer's User Manual for Digital MMA with Two Knobs
- Welding Industry Standards and Best Practices Documents